Get Started with Azure Data Factory
- Eric Rouach

- Feb 18, 2022
- 5 min read

Part 2: Create your first ADF pipeline
Author: Eric Rouach, DBA at Madeira Data Solutions
Date: 2022-02
Description: The following will guide you into building your first Azure Data Factory pipeline.
Pre-requisite: completing Part 1 of this guide
From the Azure portal, select (click) your ADF and open you Azure Data Factory Studio:

From the left panel, select the pencil icon:

Click on the ellipsis button and then, click New pipeline:

In the Properties pane, give a meaningful name to your pipeline:

Then close the Properties pane:

The pipeline should take the following actions:
-1) Truncate the staging table in the StagingDB database (Stored Procedure activity)
-2) Get the .csv file from the blob storage (Get Metadata activity)
-3) Copy the data from the .csv file to the staging table in StagingDB database (Copy activity)
-4) Get the distinct Id's from the staging table (Lookup activity)
-5) Create a Pipeline Variable called "InstituteId"
-6) Put the Id's from the previous activity into an "InstituteId" variable (Set Variable activity)
-7) For Each Id, do the following (ForEach activity):
*Get the database name (Lookup activity executing the dbo.GetDatabaseName stored procedure.
*Merge the "Institute" table using the staging external table
(Stored Procedure activity executing the dbo.MergeInstituteTable)
-8) Execute the pipeline (Debug)
-10) Create an execution Trigger.
Let’s begin!

The pipeline is now ready to get its first activity
First, we will add a Stored Procedure activity to truncate the staging table in StagingDB database:
(If hidden, expand the activities pane)

Choose “General”, then “Stored Procedure”. Drag it to the canvas and give it a meaningful name:

In the settings tab, we will have to provide a Linked Service (which will point to the relevant Azure SQL database), and an existing stored procedure name:

Fill the relevant fields as following:


Test the connection. When successful, click “Create”.
Your new Linked Service is now appearing in the activity’s settings tab:

Now, browse for the stored procedure name dbo.TruncateStagingTable:

Your first pipeline activity is now created!
The next step is to tell ADF to get some data from the .csv file you have created before. So first, upload it to the relevant blob storage container:


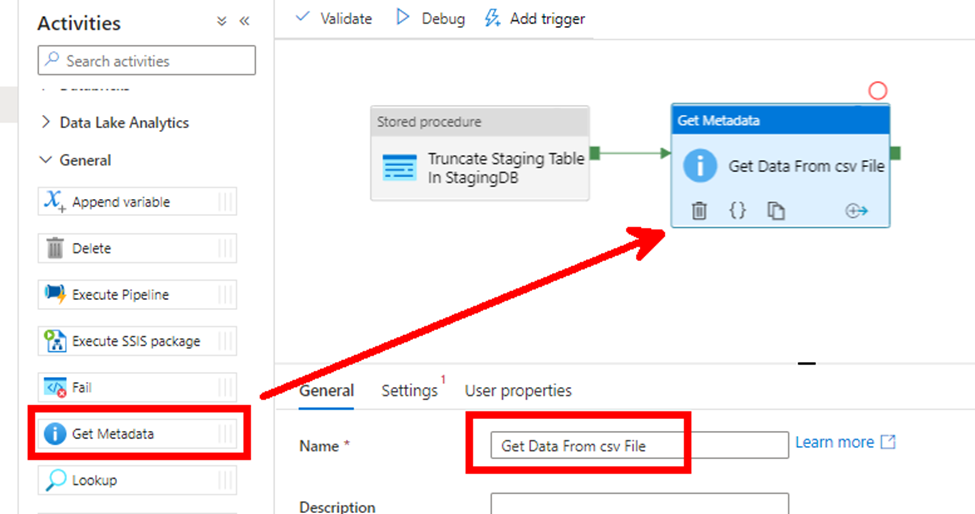
You can now call a “Get Metadata” activity to have the pipeline getting data from the file:
Drag the new activity from the pane, link it to the previous one using the green arrow, and rename it:
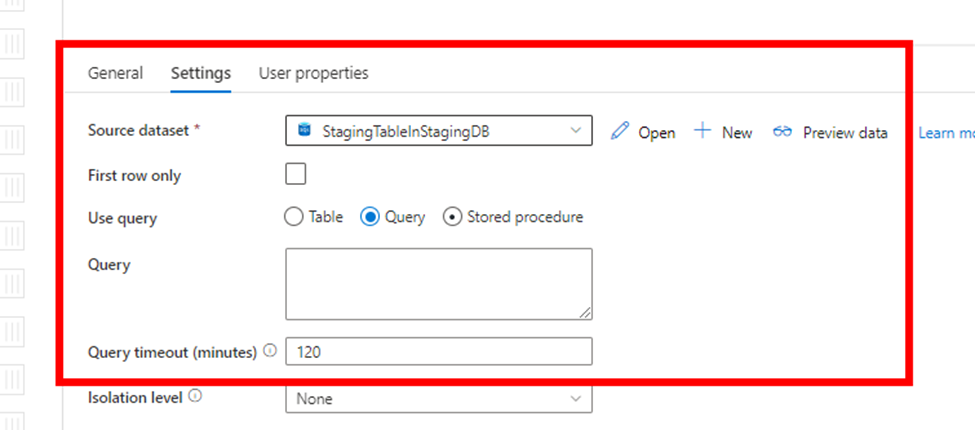
In the settings tab, you must create a new dataset (which will point to the relevant blob storage container):

Click “New” and select the Azure Blob Storage Icon:

Click “Continue”.
Select the .csv format:

Click “Continue”.
Next, you must choose a meaningful name for the dataset and create a new linked service pointing to the storage account:

Fill the relevant fields as following, test the connection and create the linked service:

Now, set the dataset file path:


Click OK. The "Get Metadata" activity now has a defined dataset:

In the Field list, select Child items:

Now, using a Copy Data Activity, you need to copy the data from the .csv file into the staging table in StagingDB.
From the activities pane, drag the activity to the canvas, and rename it accordingly:

The Source and the Sink need to be configured:

First, click the Source tab and select the previously created source dataset:

Set the File path type as Wildcard file path:

Then, in the sink tab, create a new sink dataset for the staging table in StagingDB:

Pick the Azure SQL Database icon:

Give the dataset a meaningful name, then select the previously created linked service, select the table, and click Ok:

Now, from the mapping tab, click Import Schemas:

You may now see the mapping between the source file and the target table:

After this last activity runs, the staging table should be loaded with the file data. To merge the right data to the right Institute database, we need to have the pipeline perform an activity for each institute Id found in the staging table. Therefore, our next step will be to pick those Id’s, and put them into a variable:
First, let’s add a Lookup activity to the pipeline:

From the settings tab, select the previously created source dataset and select the Query option:
In the Query, copy the following T-SQL command:
SELECT DISTINCT
InstituteId
FROM
[dbo].[StagingTable]

Click OK.
You now need to create a pipeline variable to hold the output of the Lookup activity: Click any blank part of the canvas, select the variables tab, and click New:
Choose a meaningful name and create an Array type variable:

You can now drag a Set Variable activity to the pipeline. Follow the described below steps to set the variable as the output of the Lookup activity:
-click “Add dynamic content”
-selecting the relevant Activity Output will automatically add the dynamic content
Click OK:

Now, for each Institute Id held by the variable, you will have the pipeline perform two actions:
-Get the relevant Database Name
-Merge the relevant data into it
The ForEach activity is now to be set up:

In the Settings tab, configure the variable output as the Items:

You may mark the “Sequential” option if you do not want the Foreach actions to run in parallel:

Then, in the Activities tab, click the pencil icon to add the two planned actions:
-Lookup Activity to call the dbo.GetDatabaseName stored procedure
-Stored Procedure Activity to call the dbo.MergeInstituteTable stored procedure

In the settings tab, create a new StagingDB source dataset:


Then, select “Stored Procedure” and browse from the drop down:

Check the “First Row Only” checkbox (you want to return only one row per iteration), and click Import parameter to setup the stored procedure parameters:

Click the “Value” box for the first parameter to add dynamic content:

The value should be the Foreach iterator current item:

The second parameter is an OUTPUT parameter, therefore it should be “treated as null”:

The second activity inside the ForEach loop should be a stored procedure:

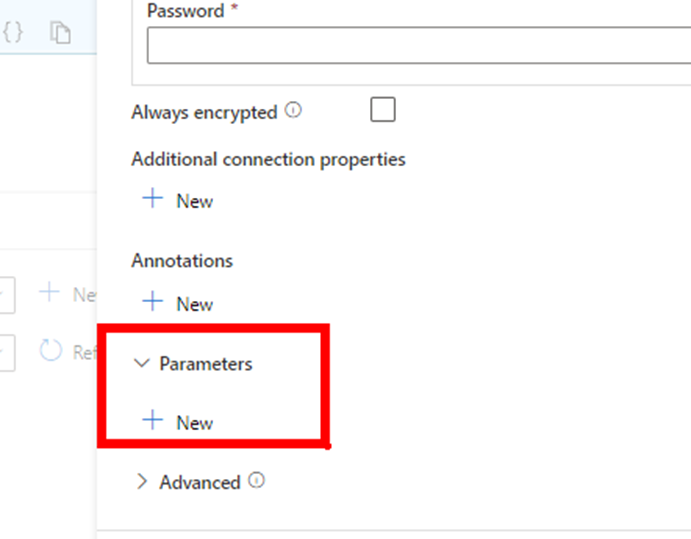
In the settings tab, you need to create a new linked service to refer the relevant Institute database. Since it should be a different database for each iteration of the ForEach loop, the linked service should be dynamic (parameterized):

First, choose a meaningful name, select the right Type and Account Selection Method (“Enter Manually”):

Before choosing a Database name, create a new parameter so the database can be dynamic:
Click “New” and create a parameter called DBName or any meaningful name you prefer:

Then for the Database name, select the Add Dynamic content option:
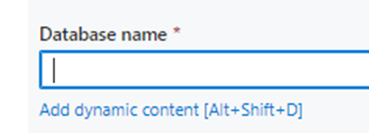
Select the parameter you just created:

Complete the missing Domain, User name, Password and click “Create”:

Back to the Stored Procedure activity, you now need to set the value for the DBName parameter:
This value must be the output of the previous Lookup activity:

Choose the “Add dynamic content” option and select the “Get Database Name” activity output:

You need to add the .firstRow.InstituteName syntax because you marked the “First Row Only” option in the previous activity.
The “InstituteName” is the output parameter of the stored procedure we execute in this activity.
Select the stored procedure name (you may have to manually insert a database name so the refresh option works and offers you stored procedures to select from the drop-down arrow):

Remember that this stored procedure receives an InstituteId as a parameter, so you need to import the parameter. Its value must be the Foreach item iterator:
Set a value using the “Add Dynamic Content” option:

Make sure to Validate your pipeline, and use the Debug button to execute:
(Any misconfiguration will fail the validation and point you to the misconfigured activities).

After the pipeline executes successfully, check if the data has well been implemented into your databases!
You may also schedule your pipeline execution by setting up a Trigger:

Creating a trigger is very simple:

Congratulations! You have created your first ADF pipeline.
--------End of part 2--------
In Part 3, we will create and implement a Logic App into the ADF pipeline so it can alert and send an e-mail in case of failure. Stay tuned!


